

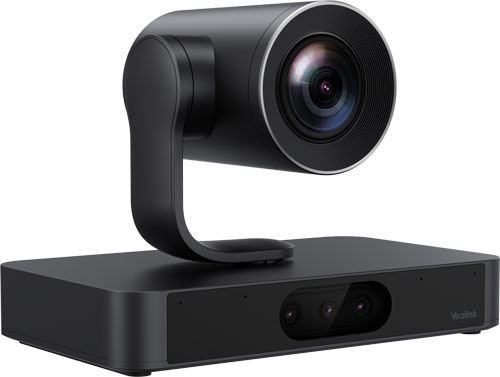
Andrew just bought a PTZ video conferencing camera to professionalize his business’s video conferencing ecosystem in their board room.
Where does he install it? How does he mount the camera? What’s the most effective location?
Melanie just bought a video bar as a simple, unified video conferencing solution in a huddle room. Her team wants to improve collaboration while projecting a better image to clients.
Is a table mount the right choice? A display mount? A stand?
In this blog, we clearly explain what video conferencing camera and video bar mounts are available, when to use which mount, and what the most effective mounting location is for each type of mount. Andrew and Melanie — your questions are answered.
Let’s get into it!
Introduction to Mounts for Video Conferencing Camera and Video Bars
Setting up a professional video conferencing system requires balancing numerous factors.
Properly positioning the system’s camera or cameras is a paramount consideration, because you don’t want to be showing a potential client just the tops of your heads or have a potential customer looking up your nostrils or have everyone be in shadows because of a strong backlight.
That’s why there are a variety of mounts for different scenarios.
What are the types of mounts for video conferencing cameras and video bars?
Sometimes the camera or video bar will come with a mount and sometimes it won’t. You need to check the package contents before purchase to know if you’re getting a mount and if that mount is what you want for your deployment.
Manufacturers make mounts themselves, and there are third-party options. We always recommend going with a first-party option if it’s available. Using the official mount ensures proper fit, protecting your investment.
A mount might work with one specific device or with a range of devices. For example, Yealink VB-WallMount-02 works for wall mounting a Yealink MeetingBar A50 Video Bar. Contrast that with HP Poly 875L9AA, which is a display mount for HP Poly Studio V52 and Studio X52 Video Bars; using it, you can mount the video bar on any display with standard VESA hole patterns — which most displays have.
To find out what first-party mount is compatible with your device, check the device’s datasheet and the manufacturer’s support website. For example, the Yealink Mounts Bracket Compatibility Lists (external link) on their support website is a complete run-down of current compatibility. We also suggest the correct first-party mounts as related products on a device’s page.
There are a few bundles, like Yealink UVC8X-Mount-Kits, that include multiple mounting types in one package, but mostly you’ll be buying a specific mounting type.
We cover AV carts and stands at the end of this blog. With these, the camera or video bar is typically mounted to a display, but we believe it’s worth covering them separately.
There’s another question we need to answer before exploring the different types of mounts.
How high do you mount a video conferencing camera or video bar?
The general rule of thumb is to mount it as closely as possible to eye height as you can; this makes eye lines look as natural as possible. Since people will be sitting in the meeting room, eye height should be measured based on sitting, not standing.
The size of the display and how high the display is mounted will affect how high or low the camera can be mounted, so you have to balance what is optimal with what is possible.
Certain camera features, like Yealink IntelliFrame, have specific recommended mounting heights; if you want to use a feature like this, make sure you follow the manufacturer recommendations.
Let’s get into the different types.
When to Use a Display Mount
Display mounts attach to a display. These have the most considerations of any mount type.
They come in two types: above display and below display. The mount may work for both above and below installation, or it may work for only above or only below.
Above display mounts come in two types. Some webcams and cameras have a display mount that clamps to the display; in this case, the mount may be part of the device itself.
Most above display mounts, however, attach to the back of a display via screws; in this case, the mount will have hole patterns for attaching either to a specific device or to a variety of devices using standard VESA patterns. These mounts are typically a platform that you screw the camera or video bar into.
Below display mounts might attach to a specific device or use VESA mounting patterns. For example, Yealink MD-PTZBracket holds a Yealink UVC86 or SmartVision 80 below a Yealink MeetingDisplay — and only a MeetingDisplay.
A below display mount will hold the camera or video bar upright or upside-down or both. If you mount a camera or video bar upside-down, the device will automatically flip the image to right-side up, if it supports that feature.
What are the advantages of display mounts?
They’re the simplest way to center a camera or video bar. Team members look at the display during a video call; if the camera is centered on the display, the team members’ eye lines will be more natural.
Similarly, they’re the best way to mount a camera or video bar close to a display. As with centering the camera, having a camera as close to a display as possible makes eye lines more natural.
Display mounts are usually the best way to mount a camera below a display, although wall mounts can work, too.
Below display mounts can be more effective for smaller groups. If the display is far enough away — but not too far — and mounted high enough, positioning the camera below the display can produce the most direct eye lines, because the camera will be, more or less, mounted at table height. That said, below display mounts can be somewhat tricky, because you don’t want clients looking up your noses so the camera can’t be too close, and from the lower angle people get hidden because of perspective.
Above display mounts tend to work better for larger and/or more distant groups. This is a matter of perspective; it’s the difference between looking at people sitting at a table while you’re seated vs while you’re standing up. You see more people standing up.
Many people think below display cameras or video bars look cleaner and more professional, but this is a matter of taste.
Either type of display mount will be easy to install. Mounts that use VESA hole patterns work with virtually all displays, including a TV you might buy at a box store, which can save you real money.
If you need to move a display, the camera or video bar will already be attached. For this reason, if you use an AV cart to make the video conferencing system mobile, the camera or video bar will likely be attached to the display.
When are display mounts inappropriate?
Display mounts are excellent for a wide range of meeting rooms, but as rooms get larger, people sit farther away. Think of a training room or a public meeting space. Eventually, people will be sitting so far away that a camera will not be able to pick them out clearly or they may be out of range for automatic features like speaker tracking. In this case, you will typically use ceiling mounts.
If you are establishing a multi-camera video conferencing system, the cameras will typically be installed to the sides of the display; in this case, you will typically use wall mounts.
Let’s get into wall mounts.
When to Use a Wall Mount
Wall mounts are attached to a wall and not a display. They are, essentially, shelves for a camera or video bar that you screw the device to. They hold the device upright.
What are the advantages of wall mounts?
Wall mounts are very stable, because they’re not attached to the display.
They offer the widest range of location options. This versatility lets you mount the camera or video bar in the optimal position. For example, with larger groups, you might want to position the camera higher to improve the perspective.
This versatility also makes wall mounts one of the best solutions for rooms with challenging lighting. Lighting is essential to consider in meeting rooms. If you can avoid it, you never want to have a strong backlight, like from windows where the sun shines in, behind call participants. Either people will be in shadow, or the background will be completely blown out.
Wall mounts can help you avoid strong backlighting by letting you position the camera at an angle that avoids the backlight. Even if mounting a camera to the side produces sub-optimal eye lines, this is usually a better solution than having a camera face a bright light source directly.
Wall mounts let you personalize the arrangement of the meeting room equipment, so everything looks great according to your taste. Because they are, essentially, just shelves, there are also more third-party wall mounts available, although we always recommend using a first-party solution.
If you’re setting up a multi-camera video conferencing system, you’ll likely be using wall mounts to install cameras to the left and right of the display. Similarly, if you’re using video conferencing cameras in a meeting space with a projector, you’ll need a wall mount.
If the room is large enough, however, you should consider ceiling mounts.
When to Use a Ceiling Mount
Ceiling mounts position the camera or video bar high up. They will hold the camera upright, upside-down, or both.
What are the advantages of a ceiling mount?
Ceiling mounts are mostly used in large meeting rooms, training rooms, public meeting spaces, and the like.
They can provide a better perspective for seeing people in a big group, like if you’re on a stage vs just standing in front of a group.
Ceiling mounts are, in most cases, necessary for large rooms where people are too far away for the camera’s zoom to pick out faces clearly. Many desirable automatic camera and video bar functions, like Yealink’s AI-powered IntelliFocus framing technology, have a set range of operation; if the camera is too far away, these functions don’t work. Ceiling mounts let you position cameras closer.
The primary disadvantage of ceiling mounts is that they hold a camera at a sub-optimal angle. People on the call will be seen from above, and eye lines will be less natural.
Because of this disadvantage, ceiling mounts are a solution for specific problems rather than a general solution like a display or wall mount.
Table mounts are also specific solutions.
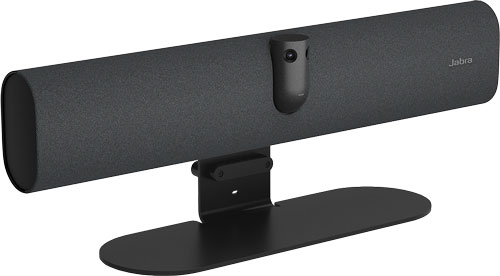
Jabra PanaCast 40 with Table Stand
When to Use a Table Mount
Table mounts are stands for positioning a camera or video bar at one end of a meeting room table; they’re often called table stands.
Table mounts are alternatives to just putting a camera or video bar on a table with no mount at all.
They elevate the device, and they’re often angled up slightly to produce a better view of people’s faces.
Besides these two factors, what are the advantages of a table mount?
The primary advantage of a table mount is making the camera or video bar portable. You can move the camera or video bar around while still having an acceptably professional angle; you don’t need to put the video bar on a bunch of books. This makes them excellent solutions for impromptu meeting rooms, and they’re most often used in smaller rooms.
They also let you use the camera or video bar in a variety of locations rather than having a set, installed location.
There are several disadvantages of table mounts.
You put a camera or video bar on a table stand at the end of a table. If you have a small table, then it doesn’t work.
They typically produce sub-optimal angles; people will be seen from lower down. With other mounts, you’re able to position the camera precisely where it’s most effective.
They’re also not as stable as the other options. Actions like someone typing or accidentally bumping the table can jostle the video bar.
Even with these disadvantages, if you want to make the device portable, a table mount is an excellent choice.
Another way to move a mounted camera is to use an AV cart.
When to Use an AV Cart or Stand
AV carts and stands aren’t typically camera or video bar mounts themselves; instead, you’ll use a display mount for the camera or video bar and attach the display to the cart or stand.
However, they’re worth considering in this blog because they offer specific advantages. AV carts make the camera or video bar movable. They also hold the rest of the video conferencing equipment.
Movability is why they’re used extensively in educational institutions — you can use the camera in a bunch of different classrooms.
It’s also why they’re used extensively in healthcare facilities for telemedicine — you can use the video bar for many patients; telemedicine carts also have storage space for medical equipment.
Display stands, on the other hand, are not movable, but they allow you to position the display — and thereby the camera or video bar — optimally in a space. If wall mounting the display is impossible because the wall isn’t strong enough or the display is more effectively positioned away from the wall, a stand is an excellent solution.
In either case, the camera or video bar will probably be attached to the display using a display mount.